Cisco RV series GUI login loop

If you’re trying to login to a Cisco RV series router and get stuck in a login loop (password is not rejected or accepted) then following the steps below.

You’ll be able to access the router again and have the configuration preserved!

  1. Format (FAT32) a USB stick.
  2. Download the latest RV340 firmware from Cisco’s website.
  3. Copy the firmware to the USB stick.
  4. Rename the firmware file to {PID}.img. Make sure to replace {PID} with the actual PID of your unit. This can be found on the unit’s label. For example, my unit’s PID is “RV340-K9”, so the file on the USB stick was renamed to “RV340-K9.img”. The PID and VID are displayed next to each other, so make sure you only use the PID.
  5. (Optional) Connect to the RV340 via the console port to confirm it’s booting up correctly.
  6. Insert the USB stick into the RV340.
  7. Turn on the RV340.

At this point, the unit will boot up and then apply the firmware upgrade. It will then reboot.

You’ll have to wait around 10 minutes for this process to complete. During this time the DIAG light will occasionally flash red.

Once the unit has booted up try logging into the GUI again.

Listing users that use POP/IMAP email retrieval

After a recent upgrade to SmarterMail 17, I noticed that POP and IMAP email retrieval wasn’t working for some users.

The fix was simple… delete the Email  Retrieval settings for the affected accounts and re-add (which was done via the webmail).

But which users were using email retrieval?

I wrote a simple PowerShell script that will run through the Domains directory and find all users that are using either POP or IMAP email retrieval.

Download List Email Retrieval Users v1.0

Maybe there’s a way to automatically fix these accounts… but, for now, at least we can identify those ones affected.

Access Cisco RV340 CLI via SSH

The Cisco RV340 looks like a great replacement for the now discontinued Netgear SRX5308, but dispite Cisco stating that Command Line Interface access is available via SSH, they don’t actually provide you with any instructions on how to connect!

When trying to connect via SSH the connection is promptly closed.

In order to get this working you need to enable SSH and then connect to a different port.

To enable SSH simply download a backup of the router’s configuration, open it in a text editor and find the following code.

Change the value false to true and then save the file.

Make sure you upload this file back to the router, apply the configuration and then reboot – just to make sure your changes are persistent.

You should now be able to connect to the router on port 2024 using the same credentials as the web GUI.

PuTTY SSH connection to Cisco RV340

Bluetooth with Dell Vostro V13 and Windows 10

I recently upgraded my copy of Windows 7 Ultimate to Windows 10 Pro and noticed that Bluetooth was now longer available.

No Bluetooth (or unknown) items were listed in Device Manager and installing the Windows 7 Bluetooth drivers (provided by Dell) didn’t help.

Knowing that Dell will probably never release new drivers for such an old laptop (late 2009) I decided to source my drivers from a competitor… Lenovo.

They use the same Broadcom chipset as the Dell Wireless 365 Bluetooth Module.

So, if you have the same problem then simply download and install the drivers from the following link.

http://support.lenovo.com/us/en/downloads/ds031759

My Wi-Fi kept cutting out after the install (when streaming music to my Nokia MD-12), but a quick restart seemed to resolve that.

Restart Master-Master Replication

Before you begin, identify the “good” server. This will be the most up-to-date master server.

Now, follow the steps below.

Good Server:

Note: Tables will be locked when running this command.

Copy this file (found in the MySQL bin directory) to the same directory on the bad server.

Bad Server:

Check that both the Slave_IO_Running and Slave_SQL_Running processes are running.

They should automatically restart after the dump.sql file is imported. If this does not happen then run the following command.

Flush and lock tables… and then check the master status.

Make a note of the File and Position values.

Good Server:

Replace the master_log_file and master_log_pos values with those recorded in the previous step and then run these commands.

Check the status of the slave to ensure that replication is working.

Bad Server:

The Master-Master replication has now been restarted!

To gain a general overview of the process, I found this article useful.

My method focuses on fixing Master-Master replication for an entire server (instead of just one database) running within a Windows environment.

Depending on how often replication breaks, I may write a quick PowerShell script to automate things a little.

IIS 7.5 cannot see NLB IP addresses

I just ran into a problem whereby new IP addresses (added to my NLB cluster) would not appear in the dropdown bindings list within IIS 7.5.

It was possible to manually enter the IP within the Site Bindings of IIS, but this didn’t allow the site to work.

HTTP error 404 was returned when attempting to access site.

The problem is caused by the new IP address not being present on the IP listen list. I’m sure that previous versions of IIS would automatically update list, but this doesn’t appear to be the case with 7.5.

To add an IP address to the listen list simply open an elevated Command Prompt and enter the following text.

netsh http add iplisten xxx.xxx.xxx.xxx

Be sure to replace the x’s with the correct IP address (for me this was the one I just added to the NLB cluster).

Hit enter and then type the following text and hit enter again.

iisreset

If all goes well, you should receive a confirmation message stating that the IP address has been added and a couple of other messages regarding the reset of IIS.

After completing the above steps I found that my site in IIS (bound to this new IP address) was now working. However, the IP address still does not appear in the dropdown list of the Site Bindings window. If anyone knows why then please let me know!

Update: Shortly after posting this article I noticed that others sites on this server (using the default IP address) were not working. It turns out that I had to add this IP address to the listen list too – despite these sites working just fine before.

The following commands may also be required – especially when experimenting.

Show IP listen list:
netsh http show iplisten

Remove IP from listen list:
netsh http remove iplisten xxx.xxx.xxx.xxx

Simple log function

I needed a way to log the console output in PowerShell, which would then allow me to email this (a quick and easy way for me to check that my automated scripts were working correctly).

The following function does just that, sort of.

Instead of capturing everything that is written to the console, text is passed to the Log function which then updates the $Log string before returning the same text to ensure it is written to the console.

Line breaks are automatically added to the string.

The code below shows how to use the Log function.

It’s important to remember that this function will not capture any errors thrown by your script. So, you’ll need to make sure you handle errors correctly.

Finding out-of-date WordPress installations

Several websites, that are hosted on servers I manage, recently fell victim to XML Quadratic Blowup Attacks. They were all running WordPress version 3.9.1 or below.

I first noticed a problem when one of the servers started to run extremely slowly. Every website it hosted was taking an age to respond and frequently timing out. The CPU was maxed out at 100%, mainly from PHP requests.

Further investigation narrowed down the website under attack. Below is a screenshot showing the traffic trend for the month to date of that website.

WordPress DoS Attack
Traffic Trend by Day report for a WordPress website subjected to a DoS attack.

On 15th August page views began to spike, with the most popular requested file being xmlrpc.php.

The temporary fix was to rename the file before installing WordPress 3.9.2, which contains a fix for this exploit.

However, I began to wonder how many other sites, that I was responsible for, could be vulnerable.

So, I decided to write a PowerShell script that scans all websites (on IIS 6 or 7) and checks their current WordPress installation version.

vScanner Console Output
Results are displayed directly in the console and can also be sent to you via email.

Since the WordPress API is used to obtain the current version, you can set this script to run as a task on your server. If an out of date installation of WordPress is detected then you’ll receive an email notification.

Download vScanner v1.0

To turn on email updates, set $SendEmail (line 5) to 1 and be sure to update lines 6 – 11 with your email address and SMTP server details.

msdeploy fails after installing Windows updates

After installing some updates (around 30 in total, between reboots) I noticed that msdeploy was failing to synchronise the IIS Metabase and files from another server.

I’ve ran into this problem before and, if I recall correctly, it also occurred after running Windows Update.

The following error was returned when trying to run msdeploy.

Error: Object of type ‘webServer’ and path ” cannot be created.
Error: Configuration system failed to initialize
Error: Unrecognized configuration section startup. (C:\Program Files\IIS\Microsoft Web Deploy V2\msdeploy.exe.config line 2)
Error count: 1.

Also, when trying to load Internet Information Services (IIS) Manager, a warning popped up saying “Configuration system failed to initialize”.

The problem appeared to be with the following files.

  • C:\Windows\System32\inetsrv\config\applicationHost.config
  • C:\Windows\System32\inetsrv\config\administration.config
  • C:\Windows\Microsoft.NET\Framework64\v2.0.50727\CONFIG\machine.config
  • C:\Windows\Microsoft.NET\Framework64\v2.0.50727\CONFIG\web.config

The first file had a size of 18KB on the server in question. However, the same file on another server in the cluster had a size of 74KB. The other files were also of different sizes.

In addition to the above, I noticed that the following files from the C:\Windows\System32\inetsrv\config\schema directory were also missing.

  • APE_schema.xml
  • heliconApe_schema.xml
  • NetFx40_IIS_schema_update.xml
  • NetFx45_IIS_schema_update.xml

I don’t know what went wrong, but can only presume (based on past experience and the modified timestamp of the first file) that Windows Update broke this.

The fix was easy – simply restore the files from a backup. You can always copy them from another server in the cluster, which is what I did.

CoPilot Central on Windows x64

CoPilot Central running on Windows XP Professional x64 Edition

The Problem

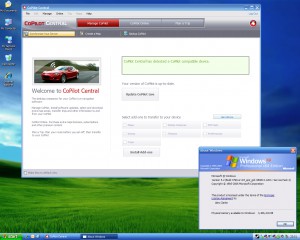
Unfortunately, after installing CoPilot Central on my desktop machine (running Windows XP Professional x64 Edition) I was unable to launch it! Trying to run the application would simply return an error message similar to the one below (copied from my Event Viewer).

EventType clr20r3, P1 copilot central.exe, P2 1.0.79.0, P3 47fb881c, P4 copilot central, P5 1.0.79.0, P6 47fb881c, P7 a81, P8 89, P9 system.badimageformatexception, P10 NIL.

I began to dig around online and it turns out that many other people have experienced the same problem. Unable to find a solution, I called ALK Support (the publisher of the CoPilot software) who informed me that the CoPilot Central application is not compatible with Windows x64! Apparently they have no plans to release an update and are currently working on CoPilot 8.

So (without being able to run CoPilot Central) I’m unable to download updates, purchase new maps, plan my routes or even load existing maps onto my Windows Mobile device! Not good.

Yes, I could dig out my old laptop and install CoPilot Central on that. Another solution would be to use Microsoft Virtual PC and install it on a virtual machine, which should work, but is far from ideal.

The above two options didn’t really appeal to me and, in the end, I decided that there must be a way for CoPilot Central to run on my x64 machine. It turns out that I was right!

After several hours of research (and a little trial and error) I managed to successfully install and run CoPilot Central (version 1.0.79.0) on Windows XP Professional x64 Edition.

The Solution

Below are the exact steps to replicate my installation process.

  1. Install CoPilot Central from the DVD supplied with CoPilot Live 7.
  2. Uninstall Microsoft Visual C++ Redistributable 2005 from Add or Remove Programs. This will have been installed by CoPilot Central. You may find that this software is installed multiple times. If so, remove all installations. Do not remove this if other software on your computer requires it.
  3. Install Microsoft Visual C++ Redistributable 2005 (x64) if it’s not already listed in Add or Remove Programs.
  4. Install only the .NET Development Tools from Windows SDK for Windows Server 2008 and .NET Framework 3.5. You can either download a DVD ISO image, which is what I did, or use the Web Setup application. The .NET Development Tools are a sub-component of Developer Tools > Windows Development Tools.
  5. Open up a command prompt (Windows Key + R and then type cmd and hit enter).
  6. Change the current directory by typing cd\program files\microsoft sdks\windows\v6.1\bin and then hitting enter.
  7. Type corflags.exe “C:\Program Files (x86)\CoPilot\Central\CoPilot Central.exe” /32BIT+ and then hit enter. This will force .NET to run CoPilot Central in 32-bit mode.
  8. Close the command prompt window and launch CoPilot Central via your desktop icon or Start Menu.

Make sure that the paths on your system are the same as those in the above code. If they’re not you’ll need to edit the code before you use it.

Conclusion

So, it is possible to run CoPilot Central on Windows x64. I’ve not tested the above solution on Windows Vista x64 yet, but I’m sure it will work.

Please feel free to leave a comment, or share your success stories, if this post has helped you out.